
-
How to Use Marshmallow Root
Category: Herbalism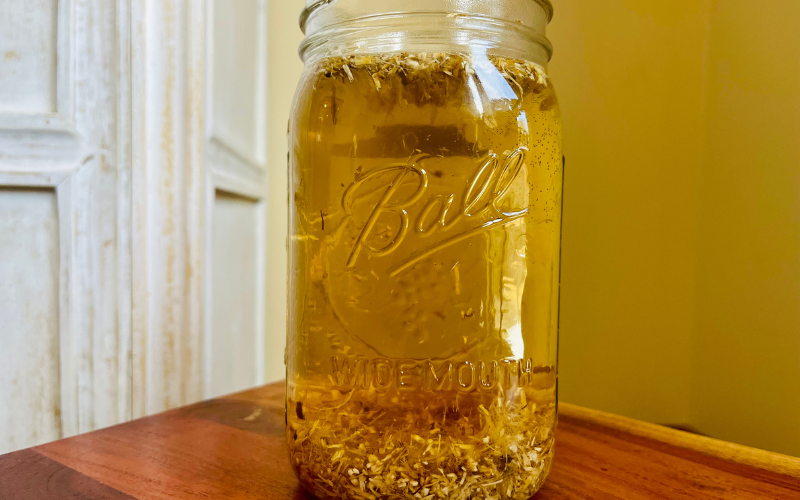
Marshmallow root is a perennial herb with thick white roots, heart shaped leaves and pink flowers. The roots, leaves, and flowers are all used medicinally. Because marshmallow is a demulcent herb, it is very soothing.
Marshmallow root contains mucopolysaccharides which protects and soothes mucus membranes and provides natural mucilage so it is helpful for many ailments, for example respiratory discomfort as well as gut healing.
Key Actions:
- anti-inflammatory
- diuretic
- emollient
- toning
Medicinal Uses:
- Colitis
- Diverticulitis
- IBS
- Gastritis
- Coughs
- Bronchial congestion
- Sore throat
Marshmallow Root Cold Infusion Tea
The best way to receive all the demulcent benefits of marshmallow is to make a cold infusion. Most importantly, keep in mind that the beneficial mucopolysaccharides in marshmallow are destroyed by heat but a cold infusion will retain those properties. However, there are still many benefits to drinking a hot marshmallow infusion as well.
What is the difference between an infusion and a tea? A tea is steeped for only a few minutes which releases the volatile oils in the herb. However, herbs with lower amounts of volatile oils work better in an infusion. An infusion is the same process as making tea (with either hot or cold water) but it is steeped for a longer period of time, allowing the healing properties to be extracted.
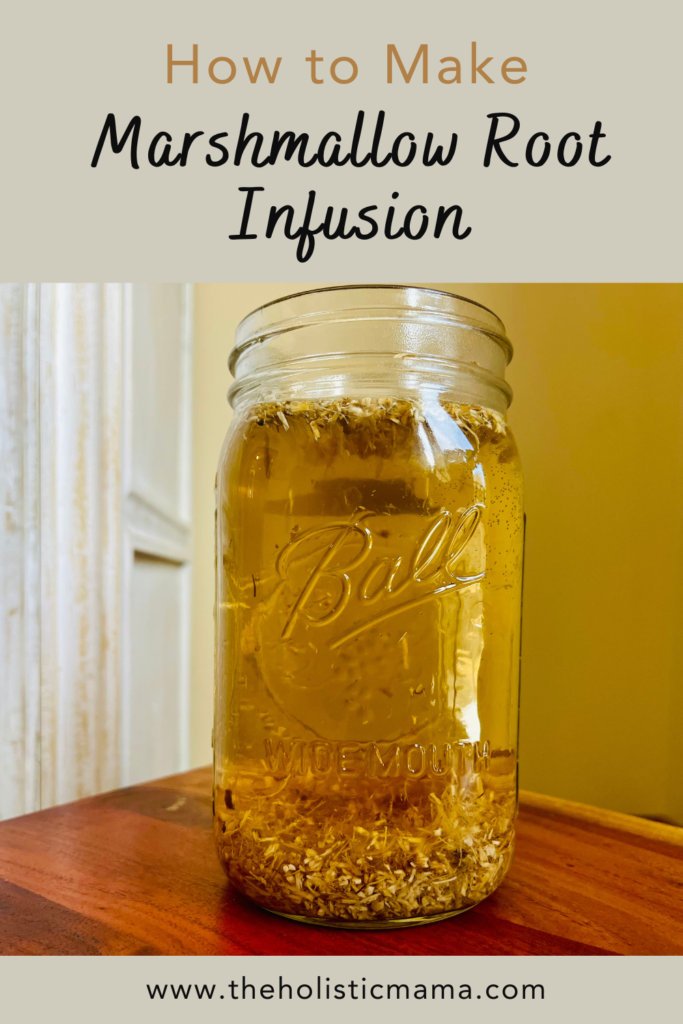
Marshmallow Root Cold Infusion
Ingredients
- 3 Cups room temperature water make sure you use a good quality filter
- 2 tbsp. marshmallow root a good source is Starwest Botanicals
Instructions
- In a clean mason jar, measure out the marshmallow root and place it in the jar.
- Next, pour room temperature water into the glass jar, stir the water, and cover.
- Let the herbs steep at room temperature for about 6-8 hours.
- After that, strain out the herbs. If you want to get every last drop of herbal goodness into your infusion, use an herb press to get all the liquid out.
How to Make a Cold Infusion
Ingredients:
- 3 Cups room temperature water (make sure you use a good quality filter)
- 2 tbsp. marshmallow root (a good source is Starwest Botanicals)
In a clean mason jar, measure out the marshmallow root and place it in the jar. Next, pour room temperature water into the glass jar, stir the water, and cover. Let the herbs steep at room temperature for about 6-8 hours. After that, strain out the herbs. If you want to get every last drop of herbal goodness into your infusion, use an herb press to get all the liquid out.
Gut Healing
Marshmallow root tea is a healthy addition to your wellness routine for gut healing and soothing of the intestines. Prepare this infusion at night before bed, the morning, and enjoy the fresh infusion when you wake up in the morning.
Sore Throat & Dry Cough
Marshmallow is safe to use for adults and children. Prepare this cold infusion when your child has a sore throat or dry cough to offer a soothing effect. Additionally, use the infusion to make an herbal syrup by adding equal parts honey to the infusion.
Other Marshmallow Preparations
- Infused oil
- Decoction
- Herbal Syrup
- Poultice
- Tincture
Marshmallow infused oil or a marshmallow poultice are used topically for it's emollient properties. You will notice it as an ingredient in many recipes for a natural hair detangling spray. Marshmallow is an ingredient we use in some of our lip balms for it's soothing effect, like this one.
Thank you for reading this post, don't forget to subscribe to stay in the loop. If you are looking for some of the healthy tools and resources mentioned in my articles, take a look at my healthy shopping guide.
Some of our links are affiliate links, which means if you click and buy, I earn a small commission. The price is the same for you, though. Thank you!
You might also like these posts…
-
How to Make Cashew Milk
Category: Real Food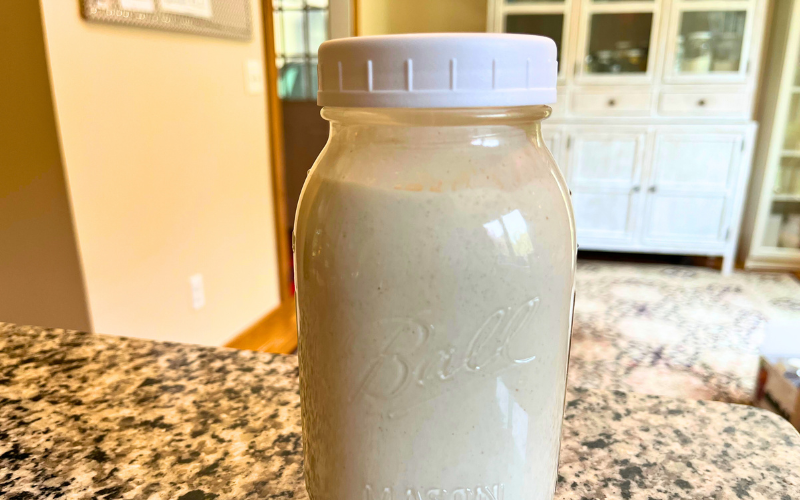
Are you wondering how to make cashew milk at home? If you are trying to eliminate or reduce cow's milk products from your diet, this is one recipe you should try. The higher fat content in cashews makes this milk a bit more creamy then almond milk and soy milk.
Store bought non-dairy milks contain fillers, gums, and sugar and most are not organic. It's very easy to make cashew milk because there is no straining involved like almond milk or other nut milks. This lasts about a week in the fridge and can be used for baking, smoothies, dressings, or your other favorite recipes.
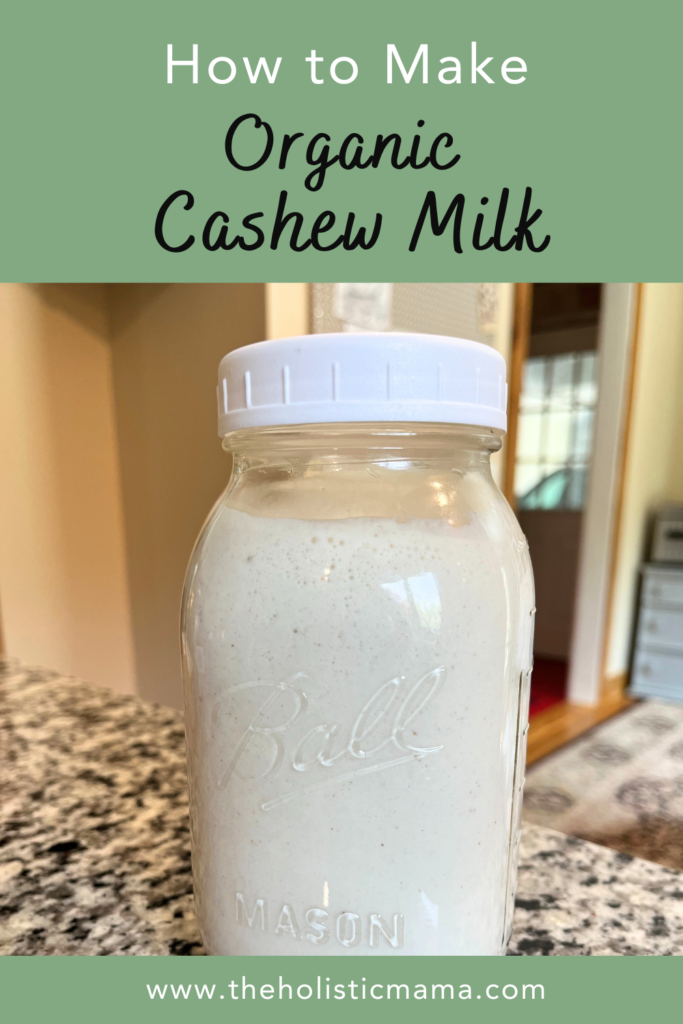
Cashew Milk
- 1 cup raw organic cashews, soaked
- 2-3 organic pitted dates
- 3 cups filtered water
Put the cashews in a mason jar and fill with water and 1 tbsp sea salt. Soak for at least 6 hours, or overnight. Strain out the cashews and put them in the Vitamix. Add the dates and water. Process on high for a minute or until completely smooth. Pour into a mason jar and store in the refrigerator. (A good place to get organic nuts aside from is Thrive Market.)
Cashew Milk Recipe
Ingredients
- 1 cup raw organic cashews soaked
- 2-3 organic pitted dates
- 3 cups filtered water
Instructions
I learned how to make almond milk many years ago when I went to the Institute for Integrative Nutrition and later experimented with different nuts. Cashew milk has been my favorite so far.
Thank you for reading this post, don't forget to subscribe to stay in the loop. If you are looking for some of the healthy tools and resources mentioned in my articles, take a look at my healthy shopping guide.
Some of our links are affiliate links, which means if you click and buy, I earn a small commission. The price is the same for you, though. Thank you!
You might also like these posts…
-
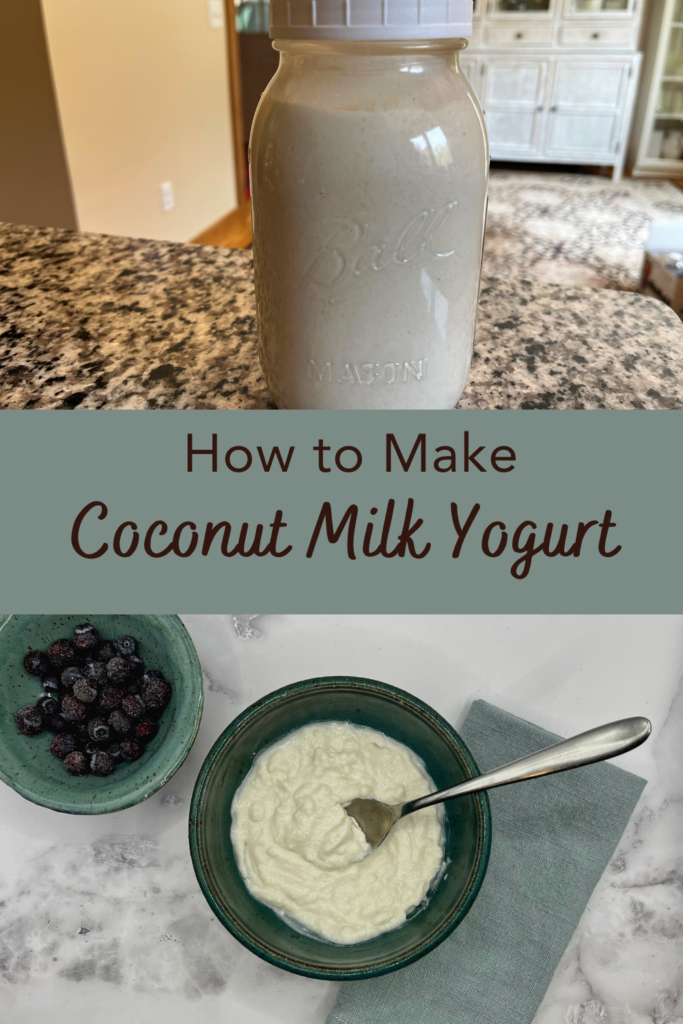
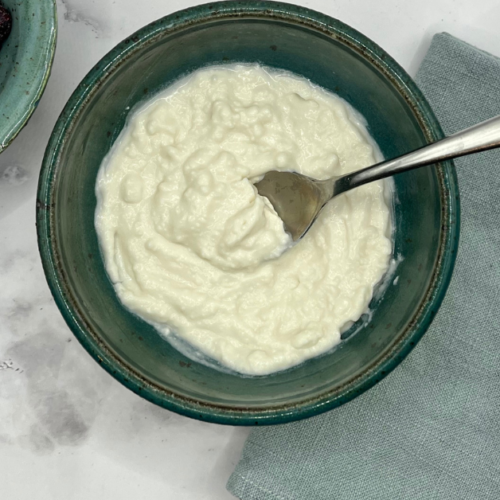
Coconut Milk Yogurt Recipe
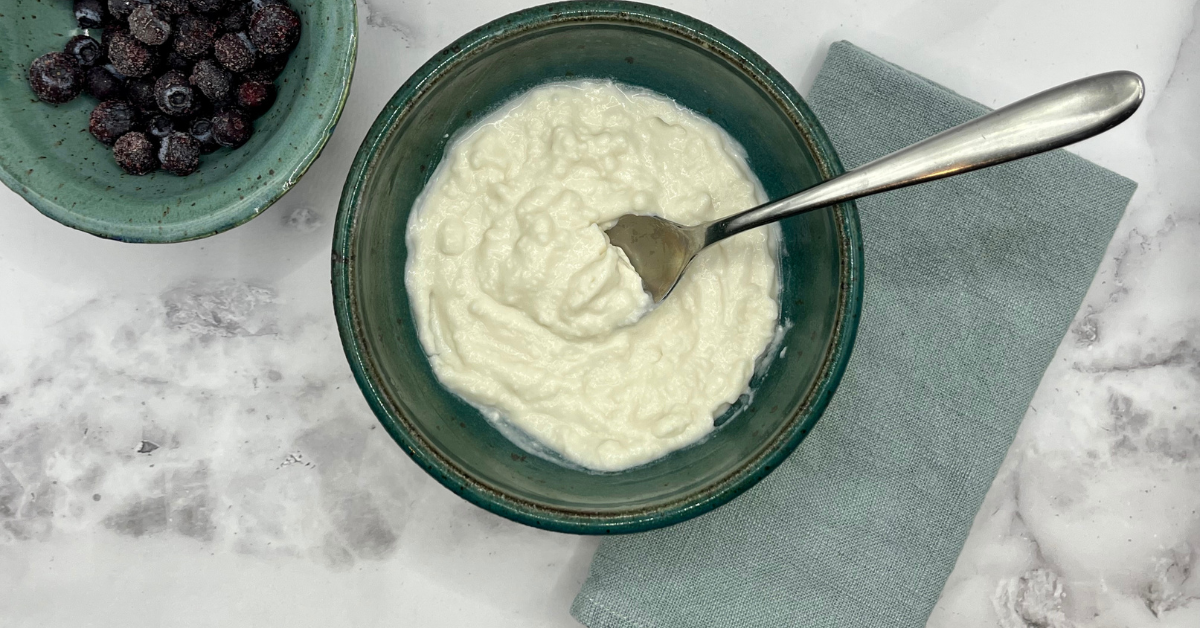
This simple coconut milk yogurt recipe will prove it's easy to make homemade dairy-free yogurt. If you are trying to limit dairy products, or prefer not to use cow's milk, coconut milk is a good substitute. It works well in yogurt because It has a thicker consistency and higher fat content. This makes it a better choice for yogurt than other non-dairy milks.
Why Make Homemade Coconut Milk Yogurt?
The problem with store bought coconut milk is the high sugar content and additives. The high sugar content cancels out the benefits of eating a cultured food. There are also gums and thickeners added to commercial yogurts. Some of the additives are unhealthy ad take away from the potential benefits.
This recipe doesn't take long to to mix together and set up the yogurt to culture. However, plan to make it a day ahead of time to allow for 18-24 hours of culturing time. This finished cultured coconut milk yogurt recipe is similar to the flavor of plain yogurt but not quite as sour. You can choose to flavor it with vanilla extract or fruit. Blend the plain yogurt it in a food processor or high powered blender like a Vitamix with your flavoring of choice. In my opinion, it is tasty on its own and my children eat it as is with granola and berries.
Coconut Milk Yogurt
Ingredients
- 2 14oz. Can Organic Coconut milk
- 1 Packet Yogurt Culture Starter Packet or 2 good quality Probiotic capsules
- 2 tsp grass-fed Gelatin
- 2 tbsp Sweetener – Coconut Sugar, Date Syrup, Honey, or Maple Syrup
Instructions
- Dissolve gelatin with 1/4 cup of milk and set aside.
- Heat the remaining coconut milk over low heat until hot (not boiling) to make it smooth.
- Remove from heat and whisk in the gelatin mixture and sweetener.Let it cool until it’s about 90 degrees.
- Whisk in the starter culture and/or probiotic capsule into the coconut milk.
- Pour into a clean 2 quart size glass jar.Cover with a lid and keep the coconut milk at 100-115 degrees for 18-24 hours. You can use a dehydrator, oven, or a yogurt maker. If you use your oven, you can use the bread proof setting (if you have it) or just keep the light on and wrap with a towel.
- When the coconut milk yogurt is finished culturing it will taste/smell a bit sour and will be slightly thicker and may be separated (this is ok just shake it up, it will thicken more once refrigerated).
Coconut Milk Yogurt Recipe
Ingredients
- 2 14oz. Can Organic Coconut milk
- 1 Packet Yogurt Culture Starter Packet or 2 good quality Probiotic capsules
- 2 1/4 tsp grass-fed Gelatin
- 2 tbsp Sweetener – Coconut Sugar, Date Syrup, Honey, or Maple Syrup
Instructions
- Dissolve gelatin with 1/4 cup of milk and set aside.
- Heat the remaining coconut milk over low heat until hot (not boiling) to make it smooth.
- Remove from heat and whisk in the gelatin mixture and sweetener.Let it cool until it’s about 90 degrees.
- Whisk in the starter culture and/or probiotic capsule into the coconut milk.
- Pour into a clean 2 quart size glass jar.Cover with a lid and keep the coconut milk at 100-115 degrees for 18-24 hours. You can use a dehydrator, oven, or a yogurt maker. If you use your oven, you can use the bread proof setting (if you have it) or just keep the light on and wrap with a towel.
- When the coconut milk yogurt is finished culturing it will taste/smell a bit sour and will be slightly thicker and may be separated (this is ok just shake it up, it will thicken more once refrigerated).
Next Batch of Coconut Milk Yogurt
Lastly, keep 1/4 cup of your coconut milk yogurt to use to make your next batch of yogurt. Follow the same process for your next batch using 1/4 cup of reserved yogurt. With your reserved yogurt there is no need for a probiotic or starter culture.
Thank you for reading this post, don't forget to subscribe to stay in the loop. If you are looking for some of the healthy tools and resources mentioned in my articles, take a look at my healthy shopping guide.
Some of our links are affiliate links, which means if you click and buy, I earn a small commission. The price is the same for you, though. Thank you!
You might also like these posts…
Trending Posts on the Holistic Mama Blog

Holistic Mama Blog