
Fermented dill pickles should be considered a superfood. So much health is packed into a small package. Fermented foods have been a part of almost every culture in history for a good reason. The natural probiotics created in the fermentation process are necessary for a healthy gut and strong immune system.
The fermentation process is the same for any vegetable (also try fermented garlic or sauerkraut). Of course there are variations that offer different flavors. A classic sour dill pickle, the kind you would find in a Jewish deli or a farmers market, are made with only a few ingredients. A salt brine is the most important part of this recipe because it allows the fermentation to occur naturally. This is called Lacto-fermentation.
What is Lacto-fermentation?
Lacto-fermentation is the process that occurs when you ferment any vegetable. The bacteria called, lacto bacilli, is naturally found in all fruits and vegetables. When you submerge the vegetables in a salt water brine it eliminates the presence of oxygen and provides a safe environment for the good bacteria to thrive. This process also unlocks nutrients that our digestive systems would otherwise not have access to which increases the vitamin and mineral content in the vegetables. Allowing this process to happen naturally without the addition of any cultures is called wild fermentation.
If you are new to the idea of fermenting I highly recommend you read, Wild Fermentation. It's a phenomenal resource for a beginner. In addition to cucumbers of course, the other two ingredients for these fermented dill pickles are garlic and dill.
How to Prepare a Salt Water Brine
This is how you can prepare a salt water bring to ferment any type of vegetable. A 2% saltwater brine is typical for fermenting harder vegetables, such as cauliflower, radishes, carrots, beets, onions, and garlic. For softer vegetables, such as cucumbers, bell peppers, and zucchini, a 5% saltwater brine is recommended.
Here is how you can prepare the exact amount of brine needed for fermenting any amount of vegetables in any size jar. This method will make the exact amount of brine for this jar with no leftover brine.
- Place an empty glass container on a scale and zero out the weight.
- Then fill the jar you plan to ferment with the vegetables which will have space around the vegetables for the brine.
- Next fill the prepared jar with enough filtered water to cover the veggies.
- Then, while holding back the vegetables with your hand or a screened jar top, pour the water into the empty vessel on the scale.
- The scale will now show the weight of the water in grams. Now you will multiply that number by 0.02 (or 0.05) to get the amount of salt needed in grams to create the 2% or 5% brine.
- Lastly, add the salt to the water, stir well with a wooden spoon until it is dissolved, and pour the brine over the veggies.
Some fermented vegetable ideas for you…

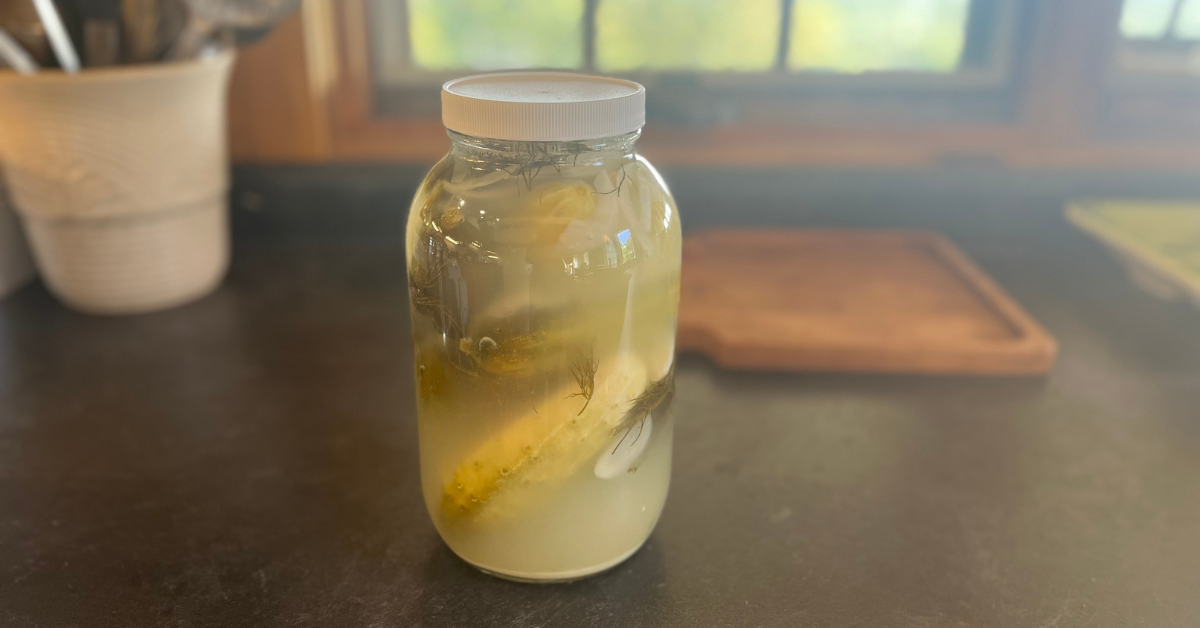
Fermented Dill Pickle Recipe
For this recipe you can just follow the measurements to make this specific fermentation. It's a recipe I have made often so I don't weigh out the brine. You will have extra brine leftover that you can use to fermented other vegetables or a second jar of pickles.
Ingredients
- 1 hand full Fresh Dill
- 3 cloves Fresh garlic
- 1/2 sliced onion (optional)
- fresh cucumbers (enough to fill your jar)
- 3 tbsp sea salt
- 1 quart hot filtered water
- 1 green or black tea bag (this is optional but helps keep pickles crisp)
Fermentation Instructions
- In your clean glass jar place dill and garlic on the bottom
- Fill the jar with as many fresh cucumbers as you can fit
- Use a glass measuring cup to mix together the salt and water to make a brine, stir until completely dissolved
- Pour the prepared brine over the cucumber in the jar.
- Put your tea bag on top and cover with a lid. An airlock lid is ideal but a plastic lid will do just fine.
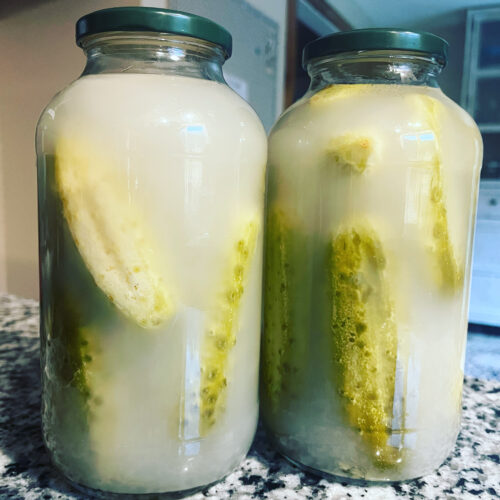
- Allow the jar to sit at room temperature for 3 days. Taste your pickles, if they have fermented to your liking, move them to the fridge and your fermented dill pickles are ready to enjoy.
Fermented Sour Dill Pickles
Equipment
- 1 Glass jar
Ingredients
- 1 handfull Fresh Dill
- 3 cloves Fresh garlic
- 1/2 sliced onion (optional)
- fresh cucumbers (enough to fill your jar)
- 3 tbsp sea salt
- 1 quart hot filtered water
- 1 green or black tea bag (this is optional but helps keep pickles crisp)
Instructions
- In your clean glass jar place dill and garlic on the bottom
- Fill the jar with as many fresh cucumbers as you can fit
- Use a glass measuring cup to mix together the salt and water to make a brine, stir until completely dissolved
- Pour the prepared brine over the cucumber in the jar.
- Put your tea bag on top and cover with a lid. An airlock lid is ideal but a plastic lid will do just fine.
- Allow the jar to sit at room temperature for 3 days. Taste your pickles, if they have fermented to your liking, move them to the fridge.
Tips & Tricks
- If you are just getting started with fermenting, any glass jar and lid will do. However, you will need to open it everyday to let out some air.
- What is the best equipment to use for fermenting vegetables? I highly recommend using a glass airlock jar or a Polish stone fermenting crock for larger batches.
- How long will vegetables take to ferment? The rate at which your cucumbers ferment will depend on the temperature of your home. Warmer temperatures cause fermentation to happen faster.
Thank you for reading,
Roxanne
Don't forget to subscribe to stay in the loop. If you are looking for some of the healthy tools and resources mentioned in my articles, take a look at my healthy shopping guide.
Some of our links are affiliate links, which means if you click and buy, I earn a small commission. The price is the same for you, though. Thank you!