
A heat infused oil is one of two methods you can use to make herbal infused oils. An herbal oil infusion is the process of extracting the active fat soluble ingredients in an herb into a carrier oil.
Cold Infused Oil vs. Hot Infused Oil
Cold Infusion
A cold infusion creates an herbal infused oil without using any heat. How you achieve this is to soak the herbs in oil for several weeks. You place your dried herbs into a glass jar, filling it about 1/3 of the way. Next, pour your carrier oil of choice over the herbs to the very top of the jar and close it tightly. Lastly, set this jar in a warm dark place for a minimum of 6 weeks before removing the plant material.
Hot Infusion
On the contrary, a hot infused oil uses heat to create the herbal oil infusion. A stovetop double boiler is the most common way to make a heat infused oil. It can also be done in a crockpot or an oil infuser.
Benefits of a Heat Infused Oil
The benefit of using heat to create your herbal oil is that it speeds up the process. Instead of waiting 6-8 weeks for your finished oil, you can have an herbal oil in one day's time.
Infused Oil vs. Essential Oil
It's important to note that infused oils are not the same as essential oils. Essential oils are only the plant's volatile oils that are extracted by steam distillation. Similarly, Infused oils are in skin care, hair care, and great for culinary purposes.
How to Make a Heat Infused Oil (Double Boil Method)
Standard Herb Ratio
- 250g dried herb
- 3 cups carrier oil – olive oil, almond oil, coconut oil, or any other high quality organic oil.
Step by Step Instructions
- Firstly, fill a mason jar or a glass measuring cup with your herbs and cover the herbs with your carrier oil. The oil should cover the herbs by a couple of inches.
- After that, place your glass container into a pot with a few inches of water to create a double boiler. Lightly simmer the water to warm the herbs and oil.
- Let this simmer gently for 2-3 hours.
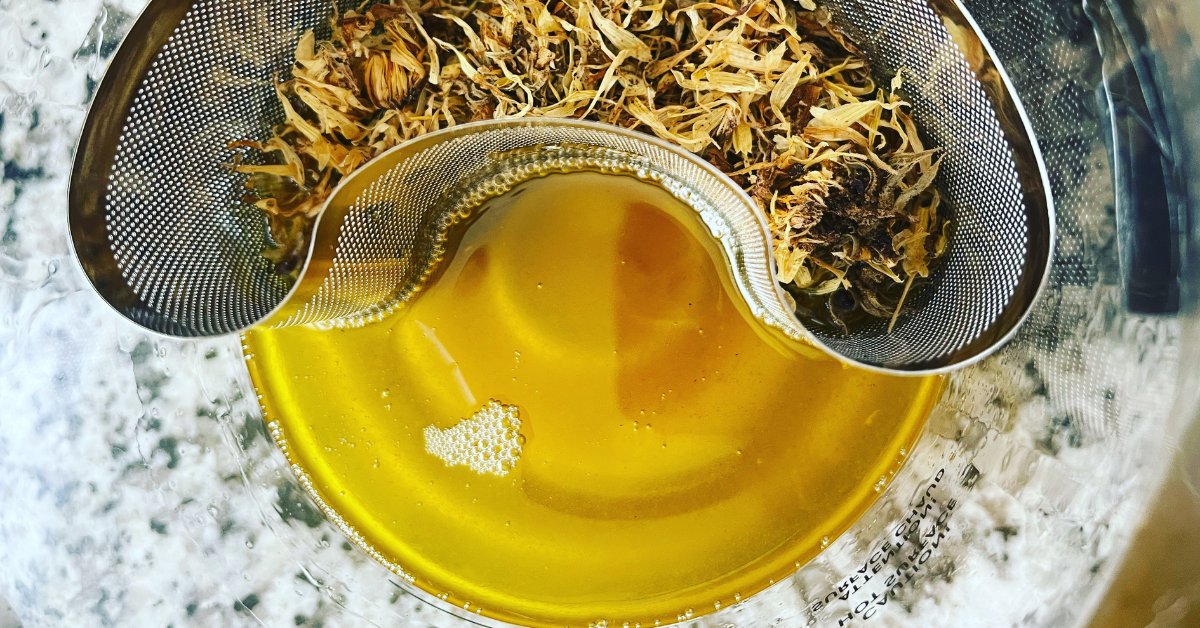
- When the oil is done, remove the heat and allow the mixture to cool, then pour into cheesecloth or a fine mesh strainer to remove the plant matter.
- Press or squeeze the herbs to get all remaining oil out. (an herb press is a handy tool for that)
- Lastly, collect the strained oil and pour into a dark glass bottle using a funnel. Seal and label the bottle.
For this purpose, you don't need any fancy equipment to make a heat infused oil – you probably already own a pot, a glass measuring cup or mason jar, and a mesh strainer. Start simply and use the materials you already own. However, if you start to make a lot of infused oils there are some fancier tools that make the process less messy and less time consuming.
Should You Use Dried Herbs or Fresh Herbs?
It's best to use dried herbs when infusing oils because fresh plant matter will release moisture into the oil which can cause mold growth. Air dry fresh herbs by laying them out on a table, using an herb drying rack, or a dehydrator before using them in oil infusions.
How long does hot infused oil last?
Store your finished infused oil in a sterilized, airtight, dark glass bottle for up to 1 year, for best results, use within 6 months.
If you want more recipes to try, download our skincare recipe book here.
Thank you for reading,
Roxanne
Don't forget to subscribe to stay in the loop. If you are looking for some of the healthy tools and resources mentioned in my articles, take a look at my healthy shopping guide.
Some of our links are affiliate links, which means if you click and buy, I earn a small commission. The price is the same for you, though. Thank you!