
-
How to Treat Infant Reflux Naturally
Category: Self Care
Looking for tips to treat infant reflux naturally? First, let’s address what reflux is and what it isn’t. Almost all babies spit up sometimes, so how do you differentiate between normal spit-up and reflux? If your baby appears happy and doesn’t seem to be in any pain or discomfort, it is likely normal spit-up and your child can be considered a “Happy Spitter”.
What is Infant Reflux?
The official term for reflux is Gastroesophageal Reflux Disease (GERD). Babies with true GERD are categorized as “Scrawny Screamers”. This may be a misnomer, however. GERD may cause your baby to under eat, because eating is painful causing your baby to become underweight (thus, the term Scrawny Screamer). GERD may also cause your baby to overeat, because sucking and swallowing may help keep the milk they drink down and the acid at bay. Common symptoms of GERD are
- Gagging choking, coughing, bad breath, excessive hiccoughing, burping
- Frequent spitting up or vomiting (if it’s projectile, it is more than GERD)
- Fussiness and trouble sleeping
Severe GERD is categorized by:
- Extreme fussiness and/or crying associated with eating
- Refusing to eat/poor weight gain
- Breathing problems
- Back arching
- Hoarseness, sore throat
- Severe congestion/chronic sinus or ear infections
- Spitting up blood or bile
General Advice for GERD Babies
These are the general tips you’ll likely hear if your baby is suffering from reflux:
- Keep baby upright as much as possible, especially during and after feedings
- Allow Baby to sleep on an incline
- Feed your baby smaller, more frequent meals
- Burp your baby thoroughly after each feeding
While these tips can be helpful for less severe cases of reflux, you may not find them to be particularly helpful for babies who are experiencing more severe reflux.
Natural Infant Reflux Remedies That Actually Work
Healthy gut flora for baby
Some cases of infant reflux may be due to an overpopulation of bad bacteria. Adding in good bacteria in the form of probiotics will help to overrun the bad bacteria. Find a probiotic that is made especially for infants, like this one. Powdered probiotics can be given in a spoon with only a few drops of water, or can be added to pumped breast milk and given in a bottle. You can even apply the probiotics to your nipple and allow the baby to swallow it while breastfeeding.
Nurse in a more upright position
Often, reflux is the result of Baby drinking too much milk too fast. If you’re breastfeeding and have forceful let down, make sure to nurse it positions that allow Baby to have better control of how much milk they’re getting. Try these positions.
Feed Baby from only one breast per feeding
Sometimes moms produce an overabundance of milk. If you’re one of those moms, nurse Baby on one breast only per feeding. This allows Baby to get both the foremilk (the more watery thirst quenching milk) and the hindmilk (the more rich, fatty, nourishing milk).
Try an elimination diet
The most common triggers are dairy, soy, wheat, and eggs. Eliminate one food at a time and for at least a week. Your child may have an actual allergy to something you’re eating.
Try Chiropractic Care
Chiropractic care is worth exploring if your baby has sever reflux that does not respond to other remedies. Seek a practitioner that has worked with infants with this issue previously.
Hazelwood Reflux Jewelry
If you’re familiar with Baltic Amber teething necklaces, this suggestion won’t seem like a stretch. Hazelwood necklaces proved to be very effective at helping to ease the acidity related to some baby's reflux.
Babywearing
This one is a no-brainer. Babies love to be worn. Choosing a carrier that allows Baby to be more upright with no pressure on the belly is ideal. The ergo is a great option, and very comfortable for Mama. Other choices include the Baby K'tan and the Moby
Swaddling
Many babies love to be swaddled. Some moms notice babies with severe reflux did best when swaddled most tightly.
Castor oil packs
Castor oil has amazing detoxing abilities, and can help flush the body of whatever is causing a problem. It can either just be rubbed on Baby’s belly several times a day or you can use the castor oil pack method. Dip a cloth (cotton, hemp, wool, or flannel- a cloth diaper would be perfect) in castor oil. Apply it to baby’s belly. Wrap with plastic wrap (to contain messes from dripping oil) and cover with a blanket or try this reusable wrap. Leave it on for 30-60 minutes, if possible. Then, give Baby a warm bath (make sure the water is filtered, I use this shower filter) with a few drops of lavender oil.
Sleep
Many babies who’ve dealt with reflux aren’t able to sleep well. Even once they are no longer experiencing reflux symptoms they may continue to be poor sleepers. This may simply be a result of never having had a chance to learn to sleep well. Once your baby seems to be free from symptoms of reflux, make teaching healthy sleep patterns a priority.
Thank you for reading this post, don't forget to subscribe to stay in the loop. If you are looking for some of the healthy tools and resources mentioned in my articles, take a look at my healthy shopping guide.
Some of our links are affiliate links, which means if you click and buy, I earn a small commission. The price is the same for you, though. Thank you!
You might also like these posts…
-
How to Make Vanilla Extract
Category: Real Food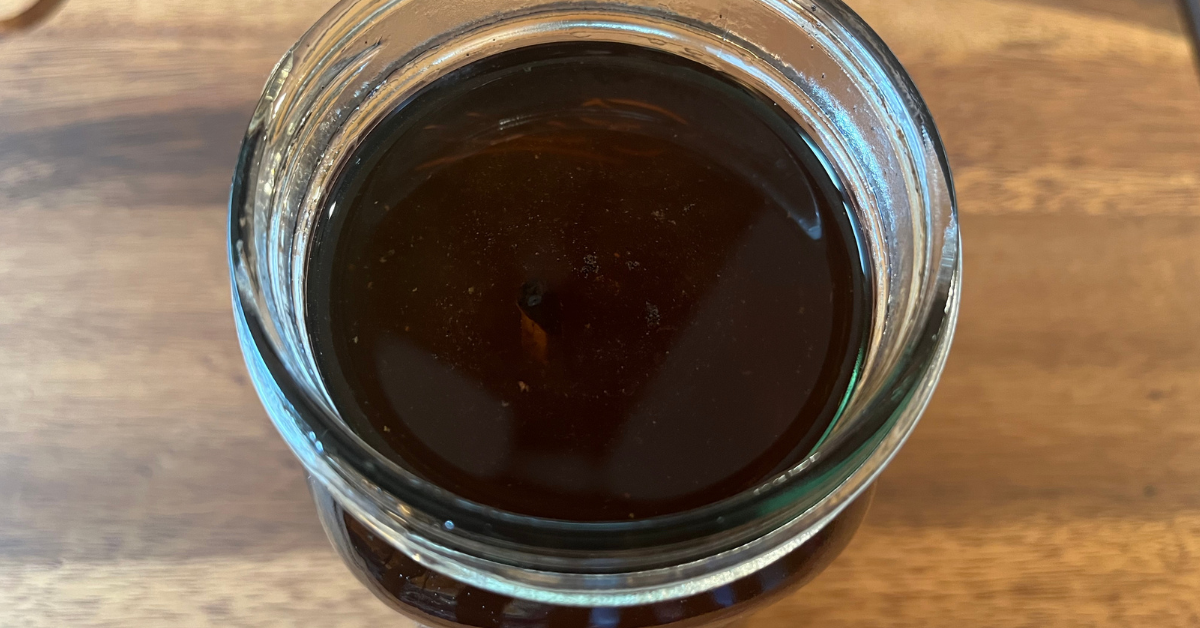
Easily learn how to make vanilla extract yourself (its a lot cheaper then buying it). Homemade culinary extracts are simple to make and only require two ingredients and time. Interestingly, the process to make a culinary extract is the same process as creating an herbal medicinal tincture.
What do you need to make Vanilla Extract?
You will only need two ingredients to make this staple baking ingredient.
Vanilla Beans
First, purchase some high quality, preferably organic, vanilla beans. There are a few different varieties of vanilla beans you can purchase. A popular choice is Madagascar vanilla. Other options include Mexican vanilla and Tahitian vanilla, any of these three types will work.
80 Proof Alcohol
Extracts and tinctures are made with a solvent to extract the flavors and medicinal properties of the herb or food. Most extracts are made with alcohol but they can also be made with vegetable glycerin for an alcohol-free version. Herbal tinctures are typically made with 80-100 proof vodka because it has little taste on it's own. When making vanilla extract, many bakers prefer to use brandy, bourbon or rum, to make the extract even more flavorful.
How to Make Vanilla Extract
Follow this below detailed recipe to make your own extract at home.
Homemade Vanilla Extract
Equipment
- 1 Glass jar with tight fitting lid
Ingredients
- 6 vanilla beans about 1/2 ounce or 15g total
- 1 cup 80 proof vodka bourbon, brandy, or rum
Instructions
- Prepare the vanilla beans by cutting each pod long ways to expose the inner vanilla past. Cut into one inch pieces.
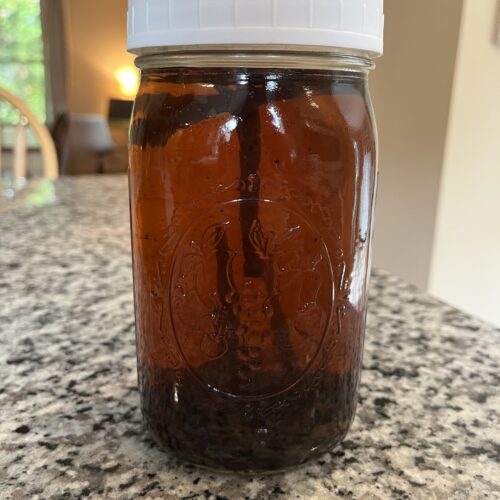
- Add the cut up vanilla beans to your clean glass jar.
- Pour your alcohol of choice over top of the vanilla beans and close tightly with the lid.
- Shake the jar vigorously to get things moving along.
- Store the jar at room temperature out of direct sunlight. Shake about once per week or once every couple weeks. Vanilla can be ready to use in as little as 8 weeks, but if you can wait at least 6 months you will get optimal flavor and 12+ months is even better!
- When you are satisfied with the flavor after some time, strain out the beans and bottle the extract in a jar to use in your kitchen. If you have only waiting 8 weeks, you can probably use the beans to make another batch. If you did a longer infusion, discard the beans and purchase new ones for your next batch.
As you can see, it's quite similar to making an herbal tincture. Below you can see that processes in step by step detail as well.
Herbal Tincture
Materials
Instructions
- Place herbs in a large, clean glass jar and pour on the solvent ensuring that the herb is covered.
- Close and label your jar with the name of the herb, solvent, and the date.
- Shake the jar for 1-2 minutes.
- Store in a cool dark place for at least 10-14 days (or longer), shaking the jar every 1-2 days.
- After 14 days you are ready to strain out the herbs. Pour the jar through a mesh strainer or cheesecloth. (There are some new fancy tools for this I have found like this herb press that helps make it less messy and extracts every last drop).
- Squeeze out the herb to get all remaining liquid.
- Discard or compost your herbs.
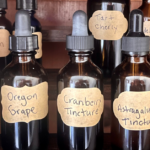
- Pour your finished tincture into a clean dark class bottle using a funnel.
- Close and label your jar with the name and date of your tincture.
Infusion Time for Vanilla Extract
Herbal tinctures are complete and ready to use in 4-6 weeks. While you can use your vanilla extract after 8 weeks, you won't get the optimal flavor. Your vanilla will be stronger and more flavorful if you let it infuse for 6-12 months. Yes, it seems like a long time but it's worth it!
Thank you for reading this post, don't forget to subscribe to stay in the loop. If you are looking for some of the healthy tools and resources mentioned in my articles, take a look at my healthy shopping guide.
Some of our links are affiliate links, which means if you click and buy, I earn a small commission. The price is the same for you, though. Thank you!
You might also like these posts…
-
How to Make a Gluten-free Sourdough Starter
Category: Gluten Free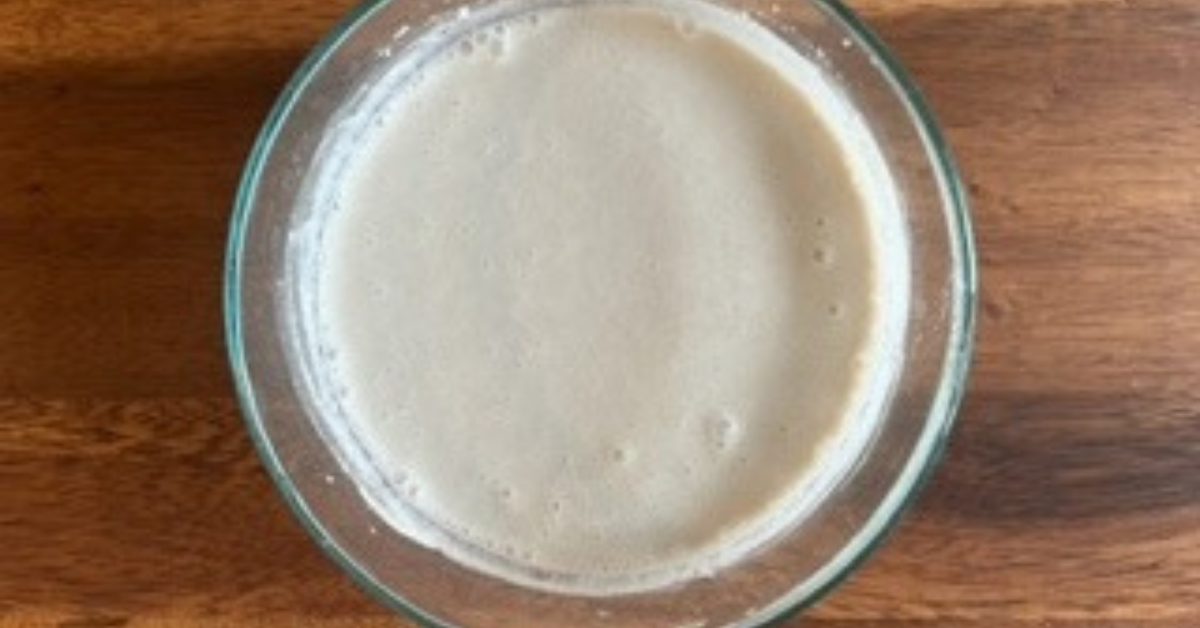
A gluten-free sourdough starter is required if you are interested in making a gluten-free sourdough loaf at home. The process for baking a gluten-free sourdough loaf is essentially the same as a conventional loaf. You will just need to swap out wheat flour for some gluten-free grain flours. A gluten-free sourdough starter can be made with brown rice flour or sorghum flour. It many be possible to use other gluten-free flours but I have not personally tested any others.
What is a Sourdough Starter?
A sourdough starter culture is a combination of water, flour, and warmth which creates the perfect environment for yeast and beneficial bacteria (lactobacillus) to grow. Once established, the culture of yeast and bacteria will need routine “feedings” to stay alive. I keep mine in a jar in the refrigerator and feed it periodically. As the yeast and bacteria feed on flour it converts sugars and starches into acetic acid also produces carbon dioxide gas. When it is fed, a sourdough starter will create air bubbles and grow in size. When the starter is used in a bread recipe if continues to feed on the starches in the recipe to ferment and rise.
Can you make a paleo sourdough starter?
If you are wondering if you can make a paleo sourdough loaf, unfortunately that is not possible. Paleo baking requires nut flour and coconut flour. These flours don't contain enough starch to create the fermentation needed for the bread to rise. Although not paleo, gluten-free sourdough bread is lower in carbohydrates due to the fermentation process.
What ingredients do I need to make a sourdough starter?
There are only two required ingredients to make a gluten-free sourdough starter. The two ingredients are flour and water – that's it. Although not required, there is a third ingredient I use when starting this process from scratch because I've gotten better results. You may be surprised that the third ingredient is an organic apple. Adding an apple helps inoculate the mixture with beneficial bacteria and wild yeasts.
Ingredients and supplies:
- Organic Gluten-free flour – brown rice flour or sorghum flour.
- One organic apple
- Filtered water
- Glass container
- Chalk marker or rubber band
How to Make Gluten-free Sourdough Starter
Day One
- In a large clean mixing bowl, combine 1 cup of brown flour and 1 cup of lukewarm filtered water. Whisk thoroughly.
- Wash and grate the apple, keeping the skin on and mix into the flour and water.
- Transfer the mixture into a glass jar with a lid. Push down the wet dough to remove any air pockets and use a silicone spatula to clean up the sides of the jar.
- Use a chalk marker or rubber band to mark the top of the flour mixture so you can easily see how much it grows.
- Lastly, put the container in a warm location and let it sit for 72 hours. Ideal temperature is 70-75 degrees. Colder temperatures will make it harder to ferment and increase the changes of mold.
Ways to keep the starter warm:
- Keep it in the oven with the oven off and the light on.
- Use the “proof” setting on your oven
- Wrap in a towel and keep in a warm corner
Day Four
During the last three days, your starter should have started to get active, bubbly, and rise. It will also smell a little fermented. Now it is time to feed your starter. First, you will need to discard a portion of it, and then add fresh flour and water. I know it seems counter productive to discard a portion of it but you can still use it in other recipes.
Feeding the Starter:- First, open the lid and stir the starter with a clean utensil.
- Next, remove and discard about half of the volume of starter in the container. To avoid waste, place it in a container to use later in other recipes.
- Now add 1/2 cup brown rice flour and 1/2 cup water to the mix. Stir thoroughly to combine.
- Clean up the sides of the container as needed so you can monitor the rise.
- Put the container back into a warm location and let it sit for 48 hours.
Day Six
Now your will repeat the same discard and feed process that you did previously.
- Stir it first, discard half, and add more fresh flour and water like we did in the previous step.
- Now, let your starter sit for 24 hours. It should rise and fall within this time frame.
Day Seven
At this point your starter should be ready to use in recipes. If you have noticed it rising and falling throughout this process, that's good! You should also notice lots of bubbles and a fermented smell.
Ongoing Care and Storage
Your new starter will need periodic feedings. It can be stored in a glass jar in the fridge. When you want to bake with it, take out a portion and feed it with equal portions of flour/water mixture to use in a recipe. Then add the same amount of flour/water to the jar and put it back in the fridge for next time.
Thank you for reading this post, don't forget to subscribe to stay in the loop. If you are looking for some of the healthy tools and resources mentioned in my articles, take a look at my healthy shopping guide.
Some of our links are affiliate links, which means if you click and buy, I earn a small commission. The price is the same for you, though. Thank you!
You might also like these posts…
Trending Posts on the Holistic Mama Blog

Holistic Mama Blog