-
How to Make Chive Blossom Vinegar
Category: Herbalism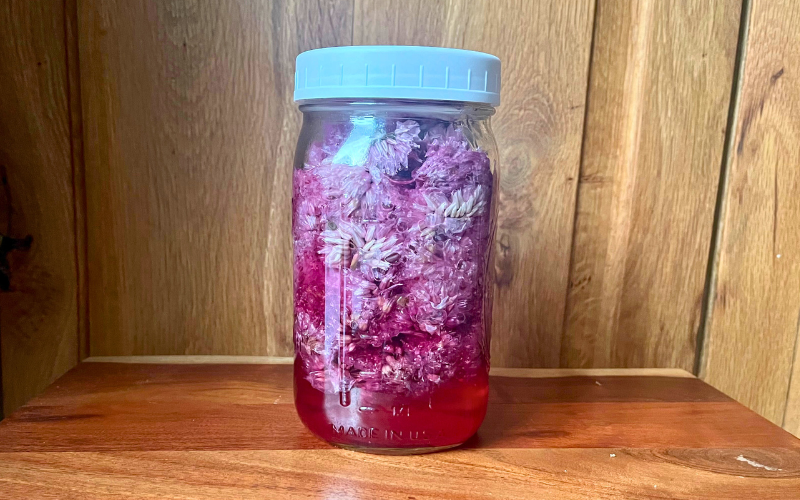
Chive blossom vinegar is a simple chive recipe. It's a simple way way to infuse your dressings and sauces with the flavor of chive blossoms. If you have chives in your garden you will start to see beautiful pink flowers open up in late April and May. You may have an abundance of them! If you are like me, you might wonder what you can create with them. I was searching for chive blossom recipes and came across this idea.
What do you do with chive blossoms?
Chive blossom infused vinegar is a really easy way to enjoy their flavor. With your finished vinegar you can add it to salad dressings and sauces. The flowers create a pink colored finished vinegar which adds to the enjoyment.
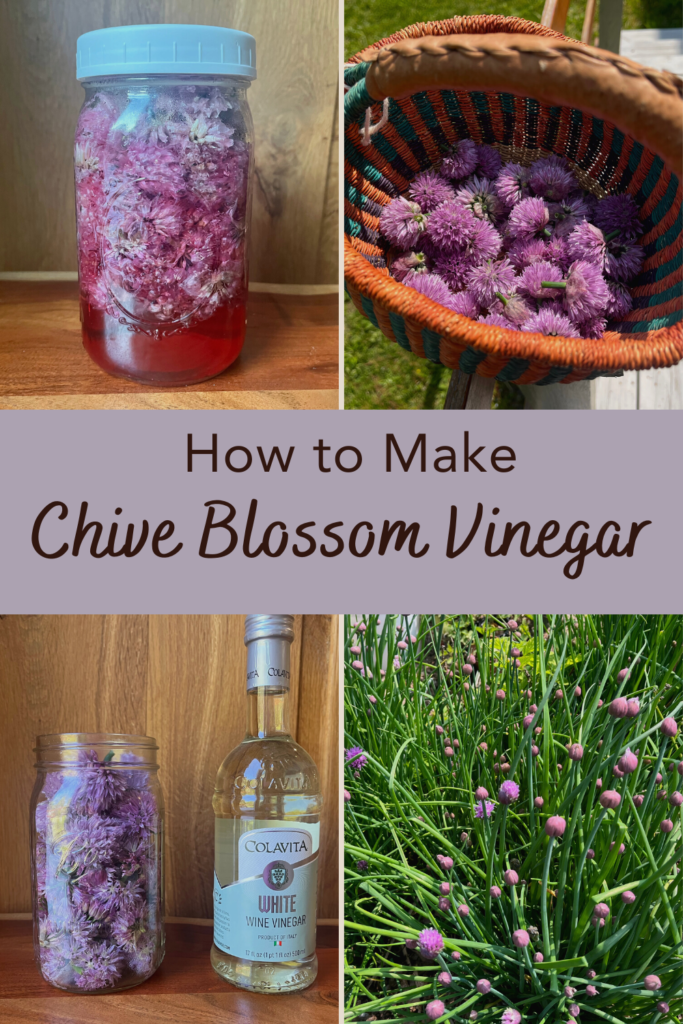
Chive Recipe: How to Make Chive Blossom Vinegar
- Collect your blossoms just after they have bloomed by snipping the top of the chive stalk. You can still use the rest of the chive stalk as you would normally.
- Lay the Blossoms out on a clean towel or pan (preferably outdoors) to let any bugs leave the blossoms.
- If you choose to, put them in a bowl and rinse with cold water (I did) and then lay on a clean towel to dry.
- When they are mostly dry, fill a mason jar with the blossoms to the top.
- Pour your choice of vinegar over the blossoms and use a spoon to gently push them down (save the empty vinegar bottle). I used white wine vinegar so that I can enjoy the pretty pink color of the finished infused vinegar.
- Let this sit from 3 days to 2 weeks. The longer you let it sit, the more chive flavor you will have.
- After the infusion time is up, strain out the blossoms and compost. Use a funnel to pour the vinegar back into the original vinegar bottle. Use in recipes as you wish! Make a chive blossom vinaigrette dressing by swapping out the balsamic in this recipe.
More Chive Recipes You Can Try
- Chive blossom butter – simply put chive blossoms or chives in a food processor to chop. Then, mix that into soften butter. Place in the refrigerator to harden up and it's ready for use.
- Pan fried chive blossoms – rinse chive blossoms, heat a skillet with olive oil and garlic. Lightly cook, add butter and salt and it's ready to eat.
Want more herbal recipes? Download our pdf booklet of herbal recipes for skin care here.
Thank you for reading this post, don't forget to subscribe to stay in the loop. If you are looking for some of the healthy tools and resources mentioned in my articles, take a look at my healthy shopping guide.
Some of our links are affiliate links, which means if you click and buy, I earn a small commission. The price is the same for you, though. Thank you!
You might also like these posts…
-
How to Make Natural Homemade Sunscreen with Zinc
Category: Natural Skin Care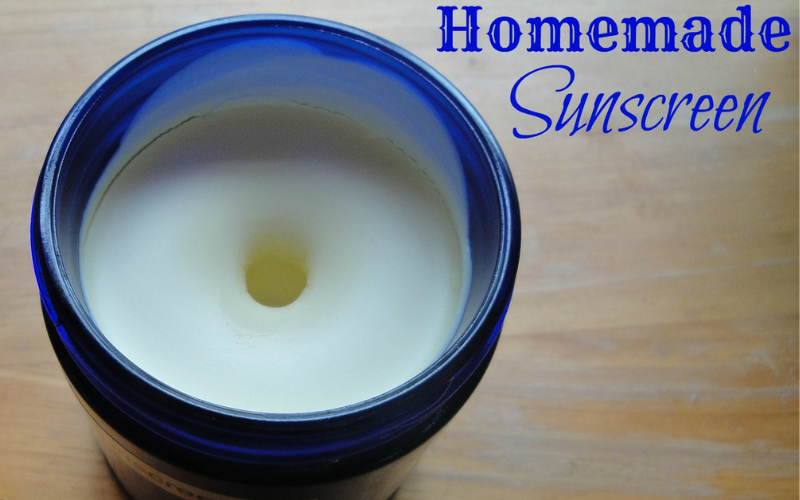
Homemade sunscreen is pretty simple to make with a few key ingredients. There are many reasons we should be concerned with commercial sunscreens due to the many harmful ingredients they contain. Some people even chose not to use sunscreen at all because of the lack of healthy options. Most people still want some protection while spending time in the sun to protect from sun damage.
What is SPF?
SPF stands for Sun Protection Factor. SPF measures the sunscreen protection from UVB rays (which is what causes sunburn). If you would usually burn after 10 minutes in the sun, an SPF 15 sunscreen would allow you to stay in the sun for approximately 150 minutes without burning. That is 15 times longer than you'd be able to without it. You can’t assume that SPF is double the protection of SPF 15, this is what the approximate protection looks like:
- SPF 15 blocks about 93% of UVB rays,
- SPF 30 blocks 97%,
- SPF 50 block 98%, and
- SPF 100+ blocks about 99.1%.
As you probably already know, anything over SPF 50 is pretty much not necessary.
Is Sunscreen Toxic?
The Environmental Working Group is the best place to get reliable information on this topic. Their yearly sunscreen guide is the best resource to find out about the best and worst sunscreen products on the market.
Sunscreen’s active ingredient comes in the form of chemical and mineral filters. It’s the chemical sunscreens that are causing the need for concern. Chemical sunscreens combine three to six of these active ingredients: oxybenzone, avobenzone, octisalate, octocrylene, homosalate and octinoxate. The worst one used in the U.S. is oxybenzone, found in 80% of chemical sunscreens.
Mineral sunblocks use zinc oxide and titanium dioxide to reflect or scatter UV rays. They do not permeate the skin and are stable in the presence of sunlight. Zinc oxide is the optimal ingredient in sunblock because it provides strong sun protection with few health concerns
Nano-zinc vs Non-nano zinc
There is concern that zinc nanoparticles can be absorbed into the skin and bloodstream. Although there isn’t a lot of research out there that proves that this is true. Nano-zinc is used because it doesn’t leave behind the white film. If you don’t feel comfortable using nano-zinc, use non-nano zinc with larger particles for your recipe (that is what I use and recommend). Non-nano zinc oxide is also considered marine safe which is another good reason to use it.
The real concern is when the powder is inhaled it can damage the lungs and enter the bloodstream. If you make your own sunscreen with zinc, wear a mask when dealing with the powder to avoid inhalation.
How Do you Make Natural Sunscreen at Home?
You can make your own sunscreen at home by blending oil, beeswax and zinc together into a butter. Follow our recipe below for an easy to make sunscreen.
The recipe in this post is at least 18 SPF based on the ratio of zinc. Some of the oils in the recipe do have their own SPF value so that adds to the protection.
Here is a good guide on SPF. Remember, adding more or less zinc oxide will change the ‘feel’ of the sunscreen, making it thicker or thinner). If you want the following SPF factors…
2-5 SPF: Use 5% zinc oxide
6-11 SPF: Use 10% zinc oxide
12-19 SPF: Use 15% zinc oxide
20+ SPF: Use 20% zinc oxide
How do you make homemade sunscreen waterproof?
The easy way to make sunscreen waterproof is to use beeswax. Beeswax forms a barrier on the skin, allowing the water to run right off.
Does Homemade Sunscreen Work?
The short answer is, yes it does. The part that is not provable is the exact amount of SPF protection you get from your homemade sunscreen. Without testing you can be absolutely sure. You can assume the lower end of the estimate to be on the safe side.
If you are looking for an alternative to commercial sunscreens this homemade sunscreen recipe is a great option.
Natural Skin Care Homemade Sunscreen Recipe
- 1/4 Cup Olive Oil
- 1/4 Cup Almond Oil
- 1/4 Cup Bees Wax pastilles
- 3 tbsp. Zinc Oxide (this is a non-nano version)
- 1 tsp. Vitamin E Oil
- 1 tbsp. Rose hip Seed Oil
- Essential oils
In a double boiler, warm the olive oil, almond oil, and beeswax on low heat until the bees wax is melted.
Afterwards, when all of the bees wax pastilles are melted, remove the oils from the heat. Add in the zinc oxide powder, and whisk until combined. Once it is incorporated into the oils, add the vitamin e oil, rose hip seed oil, and essential oils and whisk again. Pour the mixture into a jar to store. Any small glass jar will do – even an empty jar from jam, baby food, yeast, etc. works great. Put in the refrigerator to cool for 20 minutes.
Looking for more personal care recipes? Download this pdf collection of recipes.
Thank you for reading this post, don't forget to subscribe to stay in the loop. If you are looking for some of the healthy tools and resources mentioned in my articles, take a look at my healthy shopping guide.
Some of our links are affiliate links, which means if you click and buy, I earn a small commission. The price is the same for you, though. Thank you!
You might also like these posts…
-
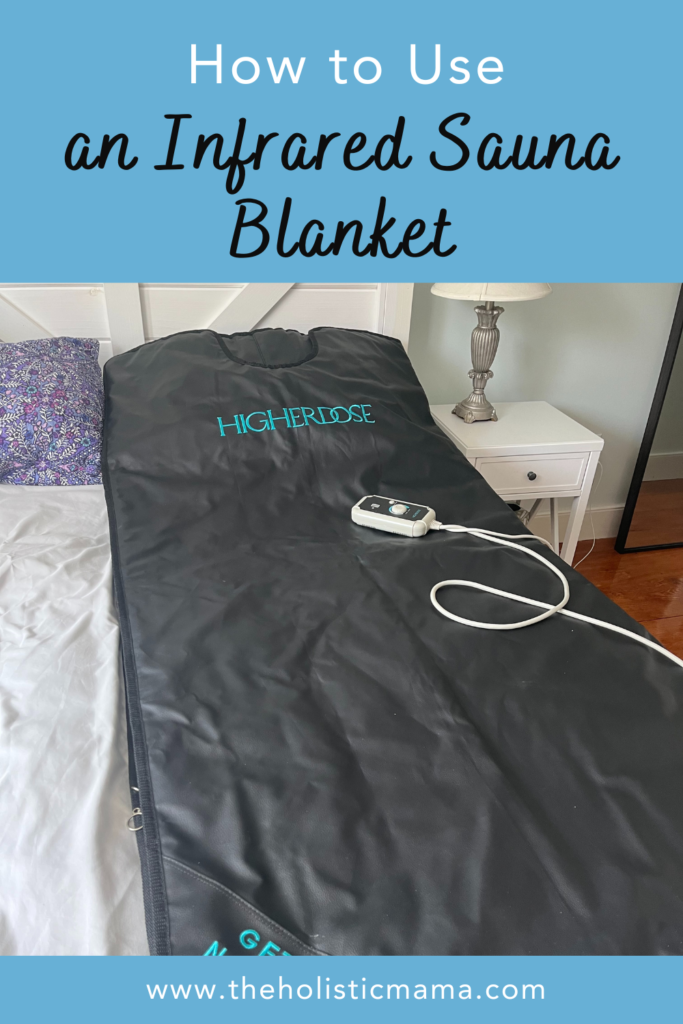
How to Use an Infrared Sauna Blanket
Category: Self Care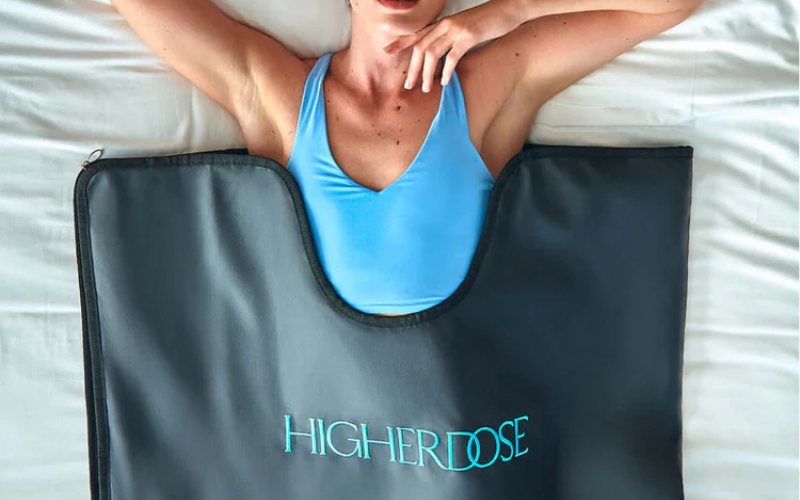
An infrared sauna blanket is very easy and convenient to use. It's a great way to begin using infrared therapy in your daily life especially if you don’t have the space in your home for a wood sauna.
Infrared therapy helps with deep relaxation, better sleep, muscle recovery, and some people feel it helps them to heal from many different ailments. I have used this helpful tool as one of the many ways I am working on hormone balance and it has been very beneficial. Read more about Far Infrared Saunas and how they work here.
How to use an infrared sauna blanket may not be as obvious or intuitive as using a wood sauna so I will go through some common questions about how to use one. Including where to set it up, how to store it, and how to clean it.
Where to use an Infrared Sauna Blanket
When your purpose in using an infrared sauna is for relaxation, an infrared sauna blanket is actually preferable over a standing wood sauna because it allows you to actually fully lay down. In a wood sauna usually there’s only enough room to sit upright.
One way to use the infrared sauna blanket is to lay it out over your bed on top of the comforter, blankets and pillows. It’s a quite comfortable setup this way. You can keep your arms and shoulders inside or outside of the blanket. Many people like to read, listen to an audiobook, or watch a movie while in the blanket. The company does not suggest using it this way – they suggest using it on top of a massage table or yoga mat which would also work well. In reality, if you are buying an infrared sauna blanket most likely you don't have space to have a massage table set up. Even if you do, it's an added step to your setup and most of us have limited time.
One thing to be very careful about is to make sure of the fabric you are laying on top of it is not sensitive to heat. It gets quite hot and could melt or damage some fabrics so it would be important to lay some thing down under the sauna blanket like a clean yoga mat.
Once you’ve decided on your set up a location, plug in the sauna blanket and then turn it onto a low setting to start. Unzip the zipper down the side in order to be able to get inside. Let it warm up for about 10 minutes.
What to Wear in an Infrared Sauna Blanket
In a traditional standing wood sauna, most people wear minimal clothing or a towel. In an infrared sauna blanket, you must wear clothing or use a special towel insert. The heating element is close up to your body so you will need to wear loose fitting top, pants, and socks inside the blanket if not using the towel insert. At first, this sounds strange but you will understand why once you do it. The clothing will become quite damp from sweat once you are finished with your session, so in to the wash it goes.
How long to Stay in the Sauna Blanket
The recommended time to stay inside the sauna blanket is 30-45 minutes. Some people start sweating sooner then others but some take up to 30 minutes to even start sweating. You may start to feel your heart rate increase as you sweat. You sweat like you’re working out, without working out. After 45 minutes you will likely be ready to get out of the blanket.
What to do after?
Once you get out of the blanket, turn the dial to off and let it cool down. You'll be ready for a shower! Many people like to take a cold shower to increase the health benefits but a warm shower is ok too.
Take your sauna session even further and follow up by using magnesium lotion or magnesium oil. Most people are chronically low on magnesium. Using topical magnesium bypasses the digestive system and gets absorbed easier.
How to Clean the Infrared Sauna Blanket
Once you have showered the blanket will have started to cool down. It's easy to clean the sauna blanket because of it's material. Get a non-toxic cleaning spray and give it a light sprtiz on the entire inside and wipe down with a cloth. Let it dry completely and cool completely before closing it back up and folding it up for storage.
How to Store Your Blanket
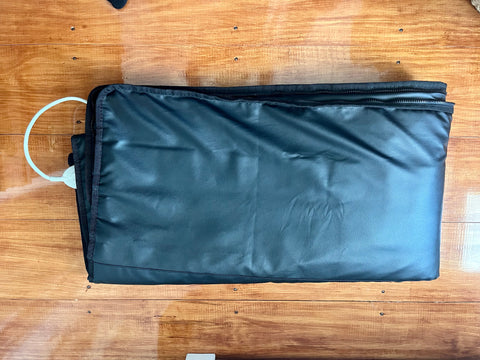
The HigherDose blanket folds up very nicely and also comes with a nice case to store the blanket. It folds up perfectly into the bag which can be stored on a shelf, in a closet, or a large drawer. It's convenient to keep it near where you will be using it for quick access. Mine actually folds and fits perfectly in my under bed storage drawer.
HigherDose Infrared Sauna Blanket Features
- Healing amethyst deepens benefits of infrared
- Tourmaline layer generates negative ions
- Charcoal layer binds to pollutants
- Clay layer emits negative ions and is balancing for the heat
- Double sided zipper for easy in and out (NEW!)
- Low EMF heating
- Easier to access controller
- Upgraded non-toxic vegan leather for extra comfort (NEW!)
- Designed in part by Dr. Raleigh Duncan, Founder of Clearlight Saunas
Learn more about the HigherDose Infrared Sauna Blanket here.
Thank you for reading this post, don't forget to subscribe to stay in the loop. If you are looking for some of the healthy tools and resources mentioned in my articles, take a look at my healthy shopping guide.
Some of our links are affiliate links, which means if you click and buy, I earn a small commission. The price is the same for you, though. Thank you!
You might also like these posts…
Trending Posts on the Holistic Mama Blog
Holistic Mama Blog